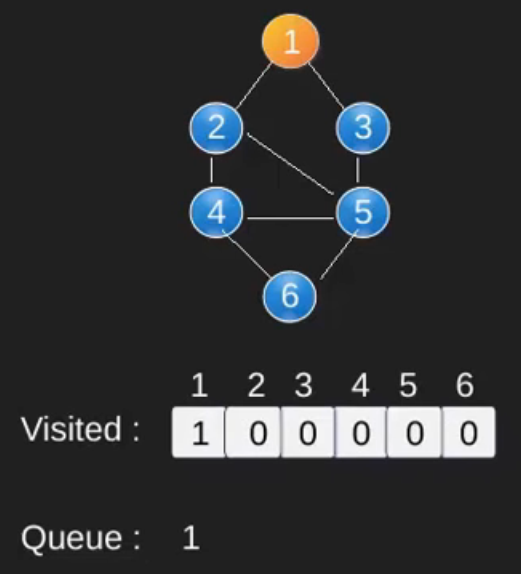
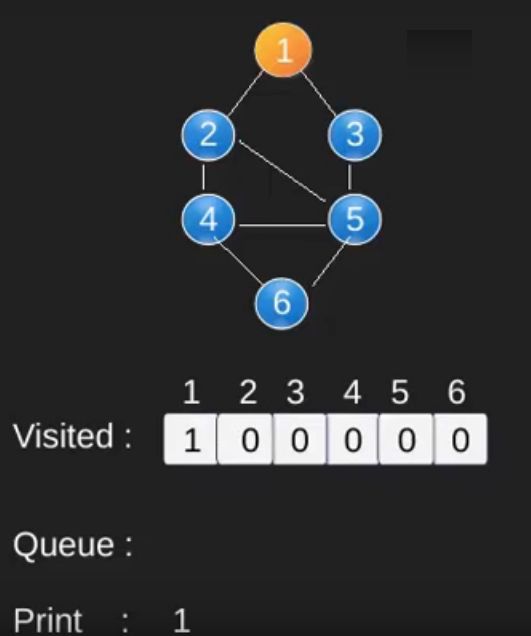
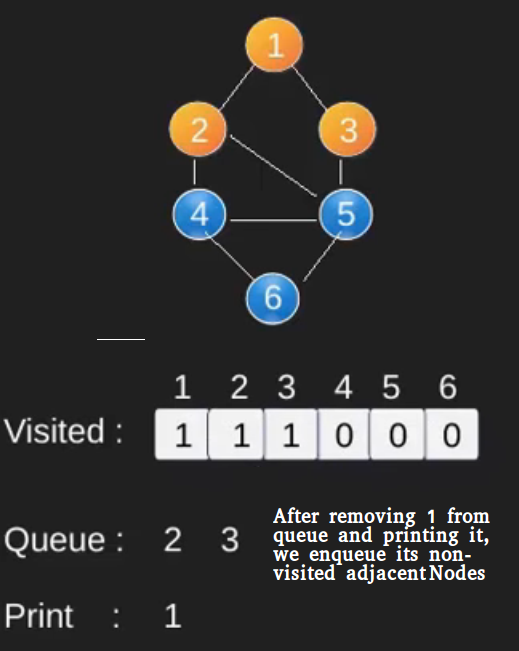
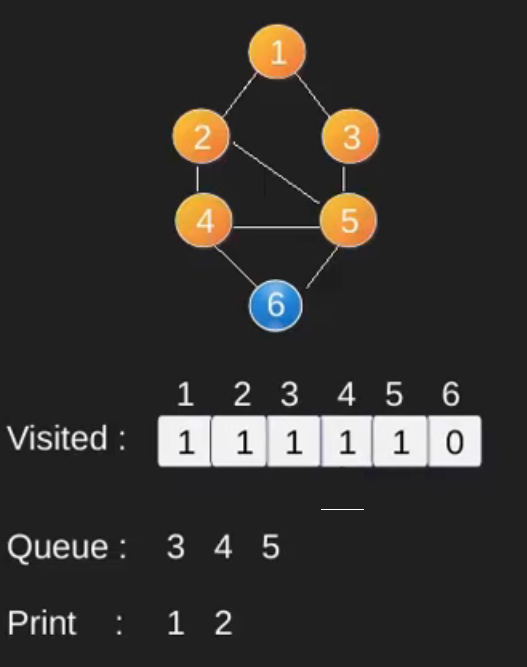
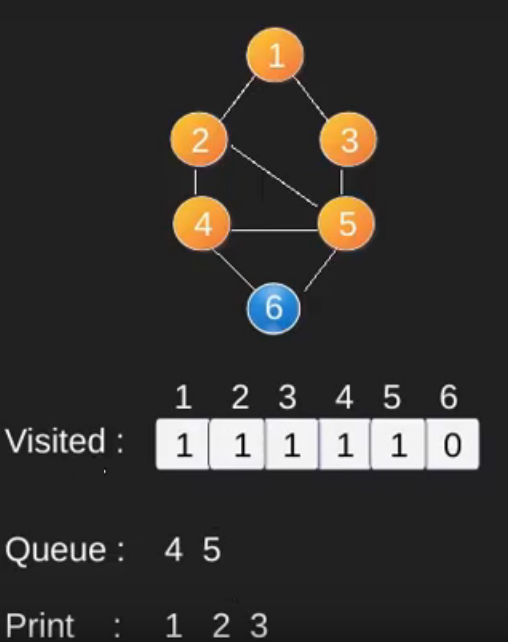
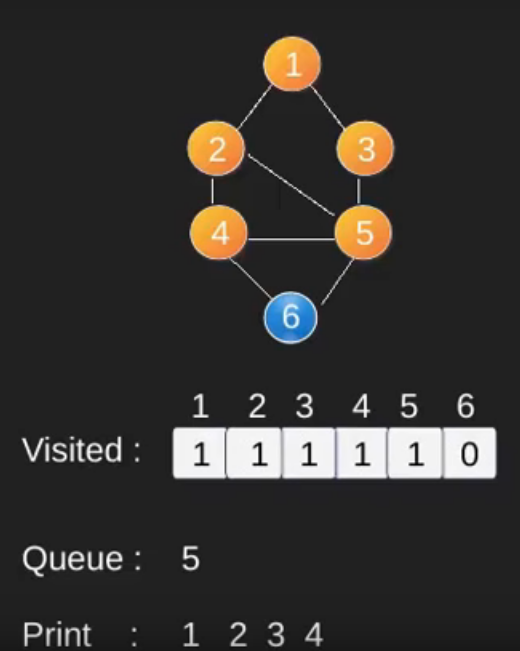
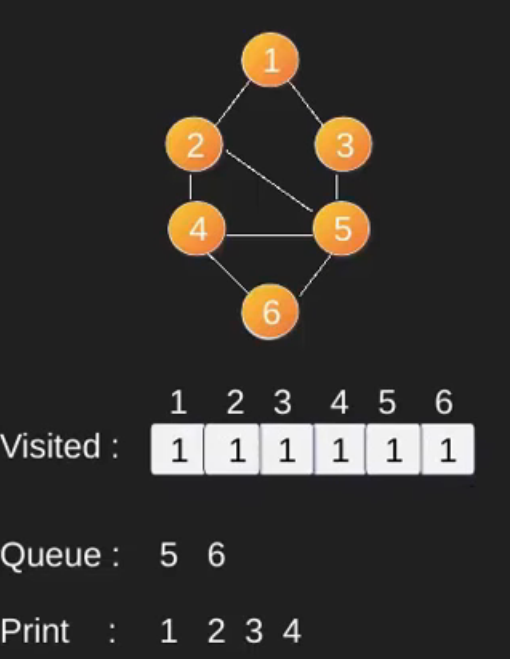
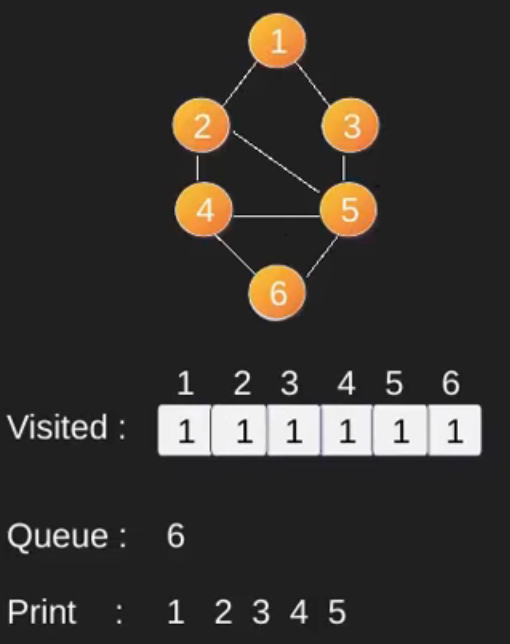
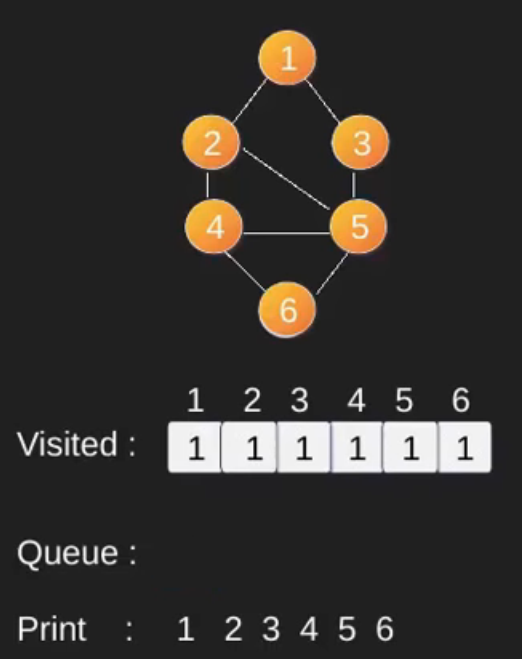
Following are the implementations of simple Breadth First Traversal from a given source.
The implementation uses adjacency list representation of graphs. STL‘s list container is used to store lists of adjacent nodes and queue of nodes needed for BFS traversal.
filter_none
edit
play_arrow
brightness_4
// Java program to print BFS traversal from a given source vertex.
// BFS(int s) traverses vertices reachable from s.
import java.io.*;
import java.util.*;
  
// This class represents a directed graph using adjacency list
// representation
class Graph
{
    private int V;   // No. of vertices
    private LinkedList<Integer> adj[]; //Adjacency Lists
  
    // Constructor
    Graph(int v)
    {
        V = v;
        adj = new LinkedList[v];
        for (int i=0; i<v; ++i)
            adj[i] = new LinkedList();
    }
  
    // Function to add an edge into the graph
    void addEdge(int v,int w)
    {
        adj[v].add(w);
    }
  
    // prints BFS traversal from a given source s
    void BFS(int s)
    {
        // Mark all the vertices as not visited(By default
        // set as false)
        boolean visited[] = new boolean[V];
  
        // Create a queue for BFS
        LinkedList<Integer> queue = new LinkedList<Integer>();
  
        // Mark the current node as visited and enqueue it
        visited[s]=true;
        queue.add(s);
  
        while (queue.size() != 0)
        {
            // Dequeue a vertex from queue and print it
            s = queue.poll();
            System.out.print(s+" ");
  
            // Get all adjacent vertices of the dequeued vertex s
            // If a adjacent has not been visited, then mark it
            // visited and enqueue it
            Iterator<Integer> i = adj[s].listIterator();
            while (i.hasNext())
            {
                int n = i.next();
                if (!visited[n])
                {
                    visited[n] = true;
                    queue.add(n);
                }
            }
        }
    }
  
    // Driver method to
    public static void main(String args[])
    {
        Graph g = new Graph(4);
  
        g.addEdge(0, 1);
        g.addEdge(0, 2);
        g.addEdge(1, 2);
        g.addEdge(2, 0);
        g.addEdge(2, 3);
        g.addEdge(3, 3);
  
        System.out.println("Following is Breadth First Traversal "+
                           "(starting from vertex 2)");
  
        g.BFS(2);
    }
}
// This code is contributed by Aakash Hasija

Output:
Following is Breadth First Traversal (starting from vertex 2)
2 0 3 1
Illustration :
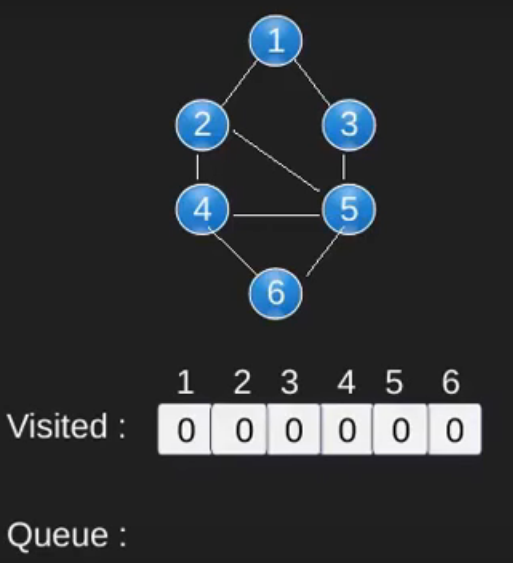
bfs1bfs2
bfs3bfs4
bfs6bfs7
bfs8bfs9
bfs10bfs11
Note that the above code traverses only the vertices reachable from a given source vertex. All the vertices may not be reachable from a given vertex (example Disconnected graph). To print all the vertices, we can modify the BFS function to do traversal starting from all nodes one by one (Like the DFS modified version) .
Time Complexity: O(V+E) where V is number of vertices in the graph and E is number of edges in the graph.

Comments

Popular posts from this blog

Education of India Part 2

History [ edit ] Main article:  History of education in South Asia The remnants of the library of  Nalanda , built in the 5th century BCE by  Gupta kings . It was rebuilt twice after invasion, first after an invasion from the  Huns  in the 5th century BCE and then after an invasion from the  Gaudas  in the 7th century CE but abandoned after the third invasion by  Turkic invaders  in the 12th century. Takshasila  (in modern-day Pakistan) was the earliest recorded centre of higher learning in India from possibly 8th century BCE, and it is debatable whether it could be regarded a university or not in modern sense, since teachers living there may not have had official membership of particular colleges, and there did not seem to have existed purpose-built lecture halls and residential quarters in Taxila, in contrast to the later Nalanda university in eastern India.  Nalanda  was the oldest university-system of education in the world in the modern sense of university. There al

Save a Workbook in another File Format

  Save a Workbook in another File Format When you save an Excel 2013 Workbook, by default it saves in the  .xlsx  format. Excel 2013 supports saving in other formats, but whenever you save a workbook in another file format, some of its formatting, data, and features might not be saved. File Formats (File Types) that are supported in Excel 2013 − Excel File Formats Text File Formats Other File Formats Excel File Formats Format Extension Description Excel Workbook .xlsx The default XML-based file format for Excel 2007-2013. Cannot store Microsoft Visual Basic for Applications (VBA) macro code or Microsoft Office Excel 4.0 macro sheets (.xlm). Strict Open XML Spreadsheet .xlsx An ISO strict version of the Excel Workbook file format (.xlsx). Excel Workbook (code) .xlsm The XML-based and macro-enabled file format for Excel 2007-2013. Stores VBA macro code or Excel 4.0 macro sheets (.xlm) Excel Binary Workbook .xlsb The binary file format (BIFF12) for Excel 2007-2013. Template .xltx The defa

Change in Charts Group

  Change in Charts Group The Charts Group on the Ribbon in MS Excel 2013 looks as follows − You can observe that − The subgroups are clubbed together. A new option  ‘Recommended Charts’  is added. Let us create a chart. Follow the steps given below. Step 1  − Select the data for which you want to create a chart. Step 2  − Click on the  Insert Column Chart  icon as shown below. When you click on the  Insert Column chart , types of  2-D Column Charts , and  3-D Column Charts  are displayed. You can also see the option of More  Column Charts . Step 3  − If you are sure of which chart you have to use, you can choose a Chart and proceed. If you find that the one you pick is not working well for your data, the new  Recommended Charts  command on the  Insert  tab helps you to create a chart quickly that is just right for your data. Chart Recommendations Let us see the options available under this heading. (use another word for heading) Step 1  − Select the Data from the worksheet. Step 2  − C